^
Abc shells definitely have some good detailing in there lexan bodies, but lets not just stop there lets go ahead and add more bits details to the shell. When i received this shell from my sponsor RCMART i didn't realise that it required cutting off the front end of the sileighty and piecing on the front end of a pignose 180sx, at first i wasn't too fond about it but i all it took was some motivation and it also allowed me to add a few little bits of extra details that made a difference.
^
The rear end is only a temporary solution for tail lights using the supplied stickers but placed on the inside, but for now it still has the look until i can find a better solution that compliments the rest of the other bits a detail.
^
window trims is something that i have been working on for awhile now, the masking part is a very tedious job but with patients the results are amazing .. you can see here that i have the inner windscreen window frit band and on the outer side you can see the rubber seal.
^
I did the same thing with the rear window.
^
The driver and passenger side windows get the painted trim treatment too, but the most detailed part in this picture are the door handles provided by Super Real Part from japan and supplied to me buy my friend (Dagul Doripak) erick who is one of the international distributors of these super scale parts, the fit wasn't as snug as i hope, the stencil that was supplied with the handles seemed to be slightly rounder in shape, none the less they definitely add a good sense of detail for this build and any shell.
^
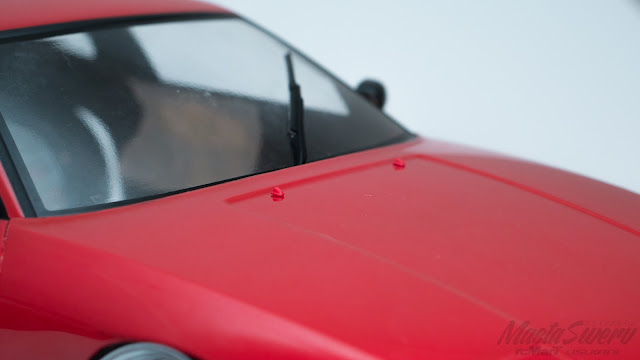
Also from SRP are these tiny goodies, windscreen water nozzles, just another great little bit of detail for your shell.
^
Id say she is 90% done, there still a few minor bits of detail to get done on this shell till i ca say that it's finally completed, but i couldn't wait to show my progress but for now she's good enough to drift to look very cool while doing so.
oh yeh forgot to mention the paint i used
Tamiya PS34 - bright red
Tamiya PS41 - bright silver
Tamiya PS5 - black
Tamiya PS55 - flat clear


No comments:
Post a Comment